Home & Contact

How to Make Dovetail Joints

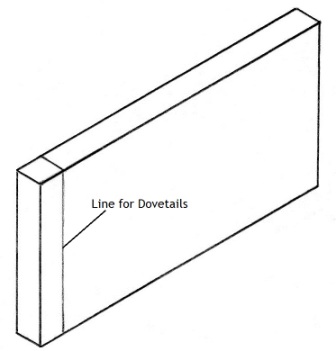
Step1: The first step is to mark a line at the end of the first piece of timber that is as wide as the thickness of your second piece of timber. Make sure to mark this line around all faces and sides of the timber.
making a dovetail joint picture 1

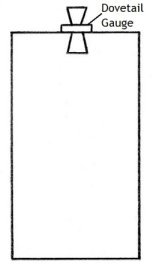
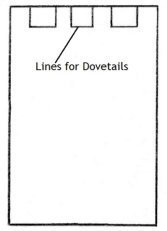
Step2: The next step is marking out the dovetails now there are a few ways of doing this but the easiest and most accurate would be to use a dovetail gauge.

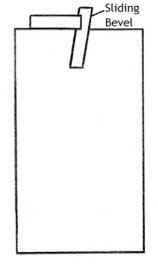
Other methods use calculations and a sliding bevel to create the dovetails which allow you to create more or less of them but also requires greater accuracy or the joint will not work so a dovetail gauge will probably be more suitable.

making a dovetail joint picture 2                                                 making a dovetail joint picture 3

Step3: You must now run across each line with a marking knife to make the cut straight and neat.

Only cut the timber which is being removed or you will see deep scratches on the pins that are not being removed. To help you remember which to mark you can put an X on the pins which are going to be removed.

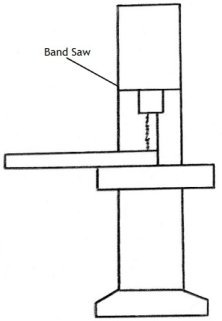
Step4: Now you must cut your dovetails and there are a few tools that can be used to do this but the two best are a band saw or dovetail saw. When using a band saw make sure to follow the lines and not cut too deep but remember this method requires much more skill and precision.

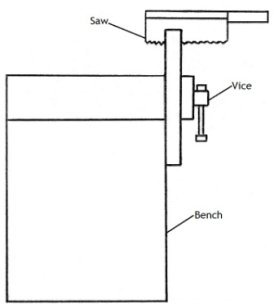
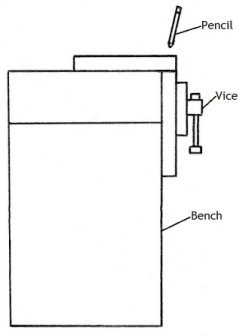
If you are using a dovetail saw you put your timber in a vice, it can be tilted at an angle to make the cut easier. Now you just use the saw to cut the straight lines and a cooping saw to cut along the bottom edge.

making a dovetail joint picture 4        making a dovetail joint picture 5
Step5: Once the dovetails have been cut out you can use a chisel or Stanley knife to clean up the joints or remove some excess timber.

Step6: Next you will use your dovetails as a template on your second piece of timber.

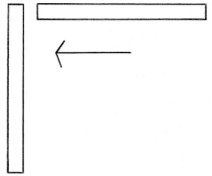
Secure your second piece of timber in a vice level to the bench and then line up your first piece of timber on top. You should now be able to use the dovetails as a template and mark lines on your second piece of timber.

making a dovetail joint picture 6
Step7: Once the lines have been marked you must mark lines on the faces of the timber which will be as long as the thickness of the timber. These lines should create pins that interlock with the dovetails so they must be very accurate.
making a dovetail joint picture 7

Step8: Cut out the pins using the same methods as in step 4 and once again remove any excess timber from the joint to ensure a perfect fit.

If the joint was marked out accurately you will have tight or very tight interlocking pins. If they are a bit too tight minimal amounts of timber can be removed. Make sure the joint is flush and square before starting the next step.

Step9: Now you can bond the joint together with glue but always check to see if it is still square. Some nails can be added in the dovetail pins to keep the joint closed and square while it dries.
making a dovetail joint picture 8
Tip: If you are making this joint for a drawer make sure that your larger pins or dovetails are at the front or it will look as good. A piece of timber can be stuck on the front to cover the joints if you wish to cover them up.
  Home
  Contact Me
  Timber
  Solid Timber
  Particle Board
  Plywood
 
MDF
  Veneer
  Joints
  Butt
  Mitre
  Rebate
  Housing
  Halving
 
Dowel
 
Biscuit
 
Dovetail
 
Mortise and Tenon
 
Bridle
 
Tongue and Groove
  Finishes
  Stains
  Oils

  Wax

  Acrylic
  Polyurethane
  Adhesives
  PVA
  Epoxy

  Polyurethane

  Contact Adhesive
  Components
  Nails
  Screws

  Hinges
  Tools
  Hand Tools
  Power Tools

  Machinery
  Facts and Tips
  Hardwood
  Softwood

  Seasoning

  Wood Layers

  Woodwork Tips
Site Map
Copyright © 2010 - 2019 woodworkbasics.com. All Rights Reserved.
Best Viewed in Screen Resolution 1280 × 720 or Higher