Home & Contact

How to Make Tongue and Groove Joints

Step1: This joint is really only used for timber boards so the first thing you must do is measure and cut up some timber boards to your required length.
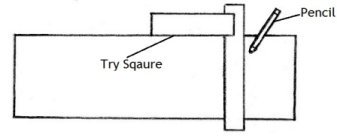
how to make tongue and groove joints picture 1
Step2: This step is not entirely necessary if you have some experience using a router but if not you need to mark the giving and receiving ends on your boards.
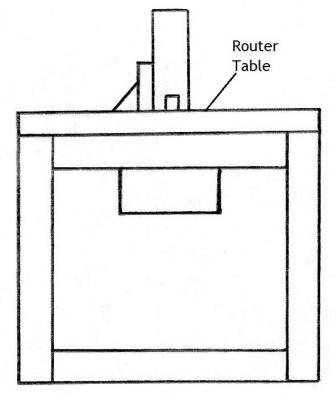
Step3: This step needs to be done with a router bench to create a successful joint and the first thing you do is start with a router bit to cut the groove. After the groove has been cut you now use another router bit to cut the tongue.
how to make tongue and groove joints picture 2
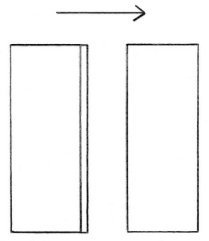
Step4: Check to see if the joint fits tightly and if it does you can now glue and clamp the boards together which will interlock from your tongue and groove joints.
how to make tongue and groove joints picture 3
Tip: You can buy lining boards which already have tongue and groove joints cut which makes this option a simpler and easier method for people with time restraints or inexperienced woodworkers.
  Home
  Contact Me
  Timber
  Solid Timber
  Particle Board
  Plywood
 
MDF
  Veneer
  Joints
  Butt
  Mitre
  Rebate
  Housing
  Halving
 
Dowel
 
Biscuit
 
Dovetail
 
Mortise and Tenon
 
Bridle
 
Tongue and Groove
  Finishes
  Stains
  Oils

  Wax

  Acrylic
  Polyurethane
  Adhesives
  PVA
  Epoxy

  Polyurethane

  Contact Adhesive
  Components
  Nails
  Screws

  Hinges
  Tools
  Hand Tools
  Power Tools

  Machinery
  Facts and Tips
  Hardwood
  Softwood

  Seasoning

  Wood Layers

  Woodwork Tips
Site Map
Copyright © 2010 - 2019 woodworkbasics.com. All Rights Reserved.
Best Viewed in Screen Resolution 1280 × 720 or Higher